Recently, I was tasked with coming up with something fun for an internal “Power Hour” event, at the end of our annual Strategy Day at my employer Inspari.
While I usually keep my darkest secrets to myself, I have occasionally revealed my teenage Rubik’s Cube mania. Either when forced to come up with “Fun Facts” about myself, or when intrusive thoughts get the better of me, and I see an unsolved cube lying on somebody’s desk.
For those who think i’m joking, Here’s the link to my profile on “World Cube Association” #humblebrag: Jon Vöge | World Cube Association
This time however, the Power Hour led me to come fully clean to my colleagues, by attempting to build a Rubik’s Cube emulator within a Canvas Power App.
For this week’s blog, I’ll take you for a brief tour of its inner workings, and share the code with you for yourself to play around with.
Standing on the shoulders of giants – Building the base Cube in Power Apps
As luck would have it, I was not the first person to attempt this. A bit of searching led me to Harjit Samra’s blog (PowerApps Rubiks Cube | HARJIT SAMRAS BLOG), which details his process.
He was even so kind as to include a link to his GitHub: GitHub – harjitsamra/PowerApps-RubiksCube.
For my App, I have relied heavily on Mr. Samra’s design, leveraging his SVGs and html controls to design the actual Cube. Hence, for you to fully understand the design process, please refer to his excellent blog.
All credit to Mr. Samra for his excellent foundational work on this.
Modifying the solution
So what did I work on for my app, if I just stole somebody elses work?
Well, first of all it appears that Mr. Samra has not uploaded the code for his latest version of the app. At least the App available on GitHub, when installed, has a few errors in its code, which leads to impossible scenarios appearing on the Cube when playing around:
Turns out, the version uploaded to GitHub lacked taking into account that not only does an “R” move on the cube need to cycle the F, U, B, and D faces. It also needs to rotate the R face itself.
In addition to making the Cube fully solvable, I also wanted to add a little bit of extra functionality and debugging features to the Cube, besides what Mr. Samra had included:
- New Buttons, clearly labeled with the Letter associated with each movement, to more easily follow scrambles and algorithms found online.
- Slight modification of the labeling/semantics of each piece on the cube, for easier understanding of functionality
- A better debugging overview allowing you to see values from the entire cube at once
And finally, and maybe more interestingly, for the sake of the Power Hour demo, I wanted to include two extra features:
- A button to automatically scramble the cube, with a randomized scramble
- A button to automatically solve said scramble (to really wow the audience)
Fixing the basic functionality
In order to make the cube solvable, I had to rebuild some of the general functionality.
The first realization in working with this Power Apps version of the cube, rather than a real-world cube, is that I had to stop thinking about “pieces”, and start thinking about individual stickers – which is completely opposite of the advice given to solvers of a normal cube.
Of course the Power App cube needs to respect the same rules as the physical one, but in the code/programming, I need to treat each sticker individually.
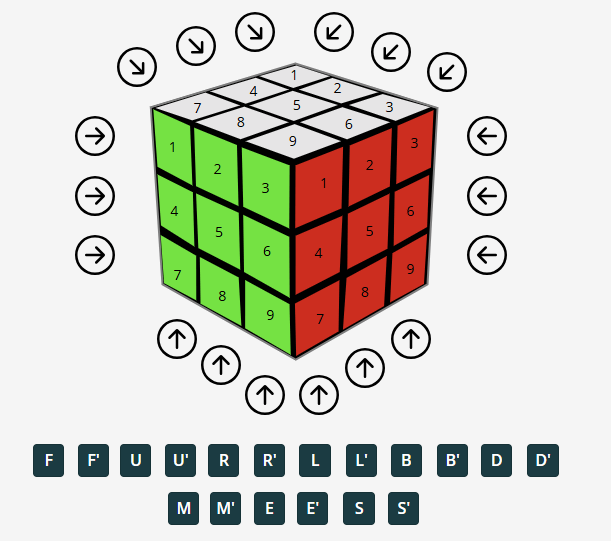
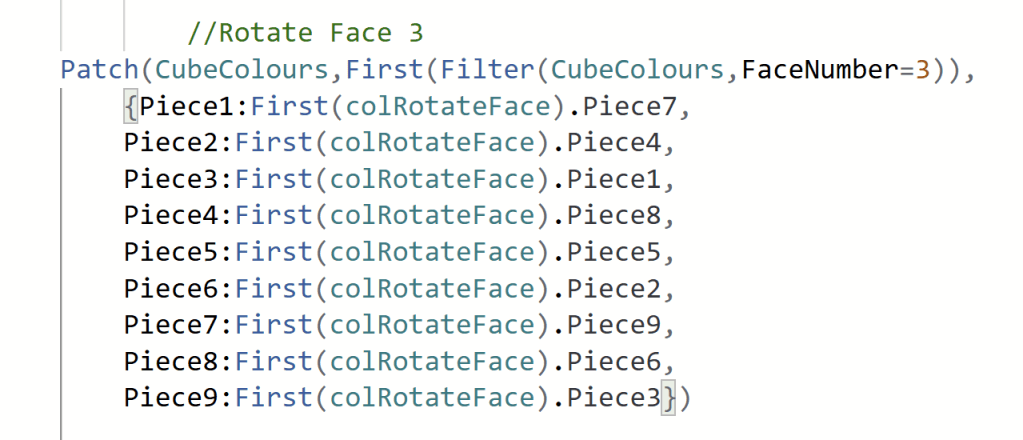
To wrap my head around this properly, I spent some time familiarizing and customizing the existing naming convention for the stickers of the cube, in order to make the movement easier to track:
Why is this important?
Well… The trouble is that no matter what you do, you can’t really label the pieces of each face consistently. Sure you can come up with a logic for “what is sticker 1, and what is sticker 7”, when looking straight at each face, but the trouble comes when you interact with a face that you do not look directly at.
When performing an L’ move, it is easy to see how Piece number 1, 4 and 7 from the Front Face will become the 1, 4 and 7 of the Up face. However the 1, 4 and 7 from the Up face, will become the 3, 6 and 9 of the Back face.. And the bottom face? Well that’s even harder to follow.
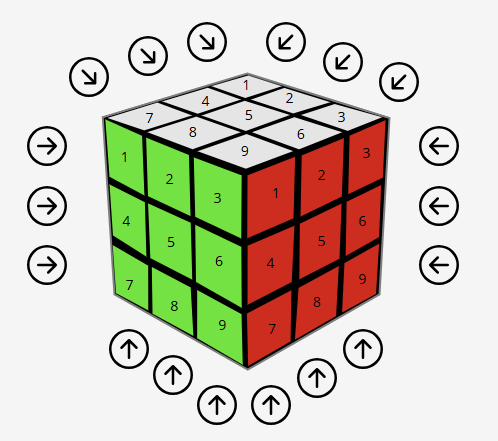
In short, it required a lot of manual trial and error, and some better debugging tools, as described in a section further below. Below is the example of making the L’ move:
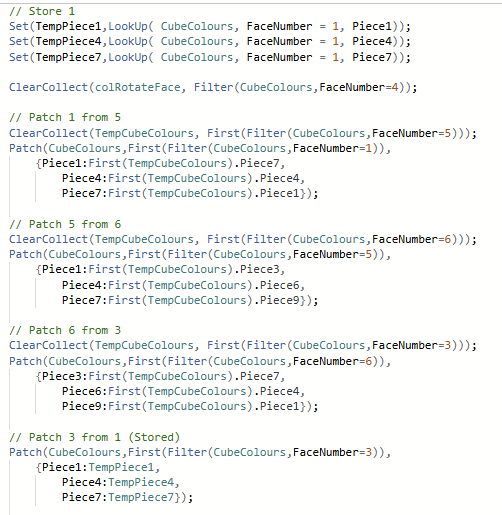
After modifying all the movement around the cube, I needed to solve the rotation of the stickers on the faces. I settled for a decently easy approach of storing the entire face in a collection, and again with manual trial and error moving these pieces around:

New Buttons for turning faces
In addition to the reworking above. In order to make it easier to follow scrambles found online, or perform algorithms, I created a series of buttons with their appropriate letters:
They simply work by selecting their corresponding arrows on the screen:

I debated for a long time whether or not to include buttons for X, Y and Z movements, but faced challenges getting them to work with my Auto Solver (see further down the post), and hence left them out.
In case of wanting to do an X move, one could simply do the three moves of R, M’ and L’, and vice versa for Y, Z and their inverted counterparts.
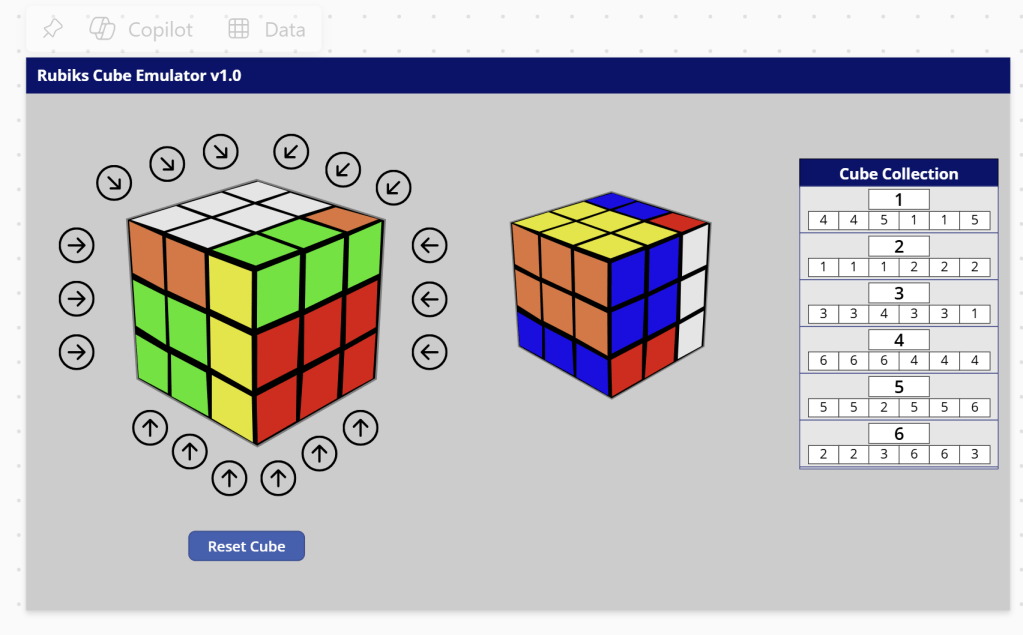
Better debugging
To allow me to bugfix and identify how pieces moved around the cube, I slightly redesigned the Cube Collection on the right side of the screen, and also added additional viewing angles of the cube:
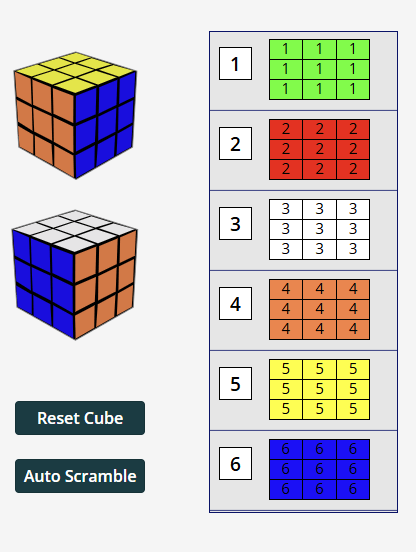
This was very simply done by changing the layout of the Gallery slightly, and just referring to the numerical value of the piece, as well as using said value to look up its color:

Auto Scramble & Auto Solve
Now, I also wanted the App to be able to randomize a scramble for the user.
To do this, I used Sequence and RandBetween, as well as a manual mapping of the values from 1-18 into Rubik’s Cube Letter movement counterparts, to first create a Collection of 25 moves to be performed.
Then, a ForAll loops through the collection, simulating button presses according to the letters in the collection.
ClearCollect(colAutoScramble,RenameColumns(DropColumns(AddColumns(AddColumns(Sequence(25,1), MoveNumber, RandBetween(1,18)), Move,
Switch(MoveNumber,
1, "F",
2, "F'",
3, "U",
4, "U'",
5, "R",
6, "R'",
7, "L",
8, "L'",
9, "B",
10, "B'",
11, "D",
12, "D'",
13, "M",
14, "M'",
15, "E",
16, "E'",
17, "S",
18, "S'")),MoveNumber),Value, Number));

ForAll(SortByColumns(colAutoScramble,"Number", SortOrder.Ascending),
Switch(
    Move,
        "F", Select(Button4),
        "F'", Select(Button4_1),
        "U", Select(Button4_10),
        "U'", Select(Button4_11),
        "R", Select(Button4_2),
        "R'", Select(Button4_3),
        "L", Select(Button4_4),
        "L'", Select(Button4_5),
        "B", Select(Button4_6),
        "B'", Select(Button4_7),
        "D", Select(ButtonD),
        "D'", Select(Button4_9),
        "M", Select(Button4_8),
        "M'", Select(Button4_12),
        "E", Select(Button4_13),
        "E'", Select(Button4_14),
        "S", Select(Button4_15),
        "S'", Select(Button4_16)
    )
);

Clear(colAutoScramble);
The end result can be seen here:
To solve the scramble automatically, I went the wrong, lazy and fake route, and simply reversed the scramble… I’m not proud, but just needed something for the wow effect at the Power Hour Sometime in the future, I’ll find a way to actually auto solve it logically.
Anyway, for the reversal of the scramble, I first made all the Arrows on the app collect the movement into a collection:
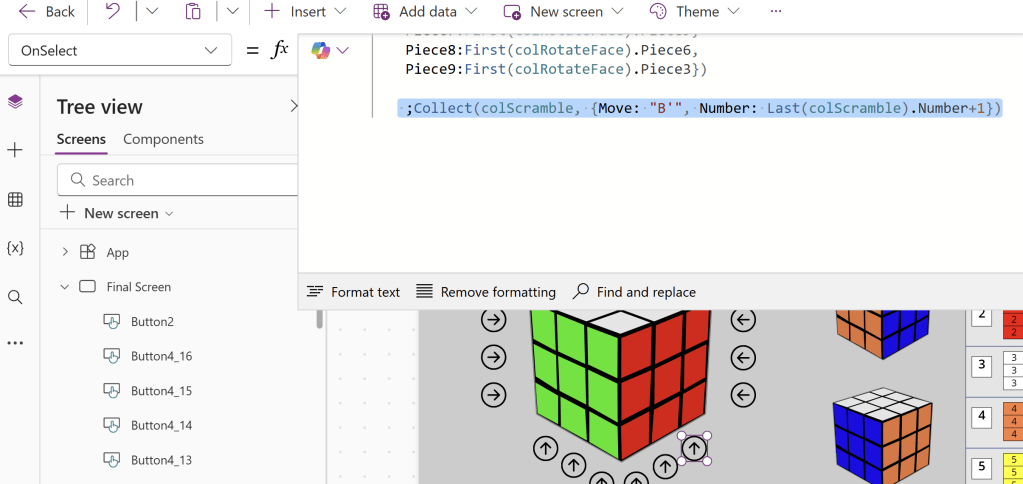
And for the magic trick at the Power Hour, I created a hidden button in the Lower Right corner of the screen, which loops through said collection, performing the moves, just like the auto scramble button:
ForAll(SortByColumns(colScramble,"Number", SortOrder.Descending),
Switch(
    Move,
        "F", Select(Button4),
        "F'", Select(Button4_1),
        "U", Select(Button4_10),
        "U'", Select(Button4_11),
        "R", Select(Button4_2),
        "R'", Select(Button4_3),
        "L", Select(Button4_4),
        "L'", Select(Button4_5),
        "B", Select(Button4_6),
        "B'", Select(Button4_7),
        "D", Select(ButtonD),
        "D'", Select(Button4_9),
        "M", Select(Button4_8),
        "M'", Select(Button4_12),
        "E", Select(Button4_13),
        "E'", Select(Button4_14),
        "S", Select(Button4_15),
        "S'", Select(Button4_16)
    )
);

Clear(colScramble);
The end result can be seen here:
Conclusion
While some of the routing and tracking of pieces around the cube was a tedious task, it was fun to see it all come together.
If you want to download the project to try it out yourself, you can find an export of my modified version of the Power App on my Github: speaker-material/PowerAppRubiksCube_20250312121607.zip at main · Jonvoge/speaker-material
And again thank you to Harjit Samra for the foundational work on this!


Leave a comment