Introduction
I couldn’t quite decide what to call this concept. Perhaps it has a well established term already, if so please let me know. Otherwise, let me introduce you to the term “User Defined Input Screens”.
Imagine this scenario:
You have a Power App in which Users need to fill out a number of input fields. Very standard. But. The input fields need frequent updates, with new questions often being added, making it hell for the Power Apps developer to predefine the fields on the screen.
To give a more specific example, I faced this requirement with a customer who used a Power App for Key Account Management data.
Key Accounts would be sorted into different categories, and each category of Key Accounts had slight variations in the input fields required. And the real kicker was that new Categories of accounts would frequently be added, meaning a new set of questions for this new category of accounts had to be defined.
In the ideal world, I wanted to remove the Power Apps developer from the equation, and let the users themselves define new questions as the need arises.
How would you solve this?
My solution: User Defined Input Screens.
Through clever use of Collections, Galleries and pre-created input control placeholders, I came up with a method for the “Admins”/”Super Users” of the App to define a collection of questions and their corresponding input types on one screen, and a way to dynamically display the relevant questions and show/hide the correct placeholder input control in a gallery on another screen.
Confused? Let’s walk through the setup.
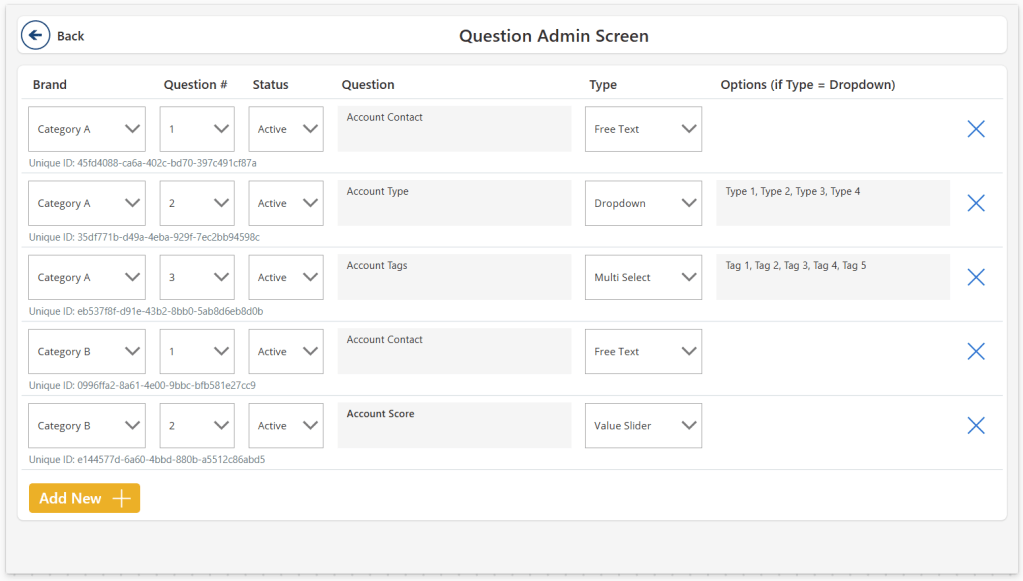
Creating the “Question Admin” screen

The Question Admin screen in this case maintains a local collection that is subsequently patched to a table in a dataverse table or SQL DB table. Note that for this demo I just have a local collection, but in any production scenario you of course need to persist this collection in, and subsequently load data from, a table somewhere in the cloud.
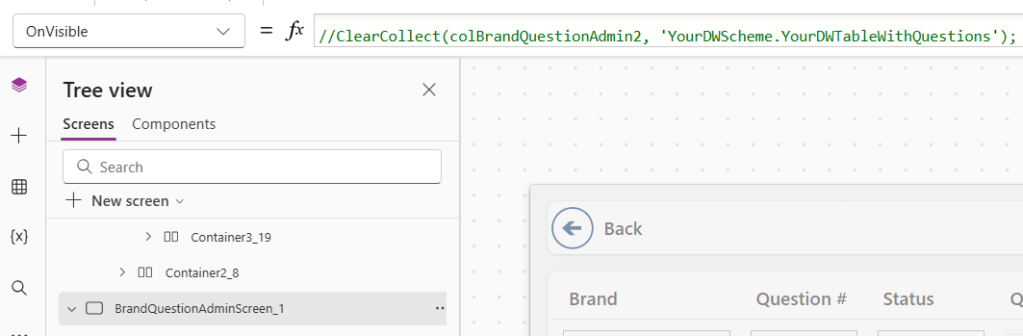
OnVisible, the Screen loads all existing records from the cloud table into the local collection:
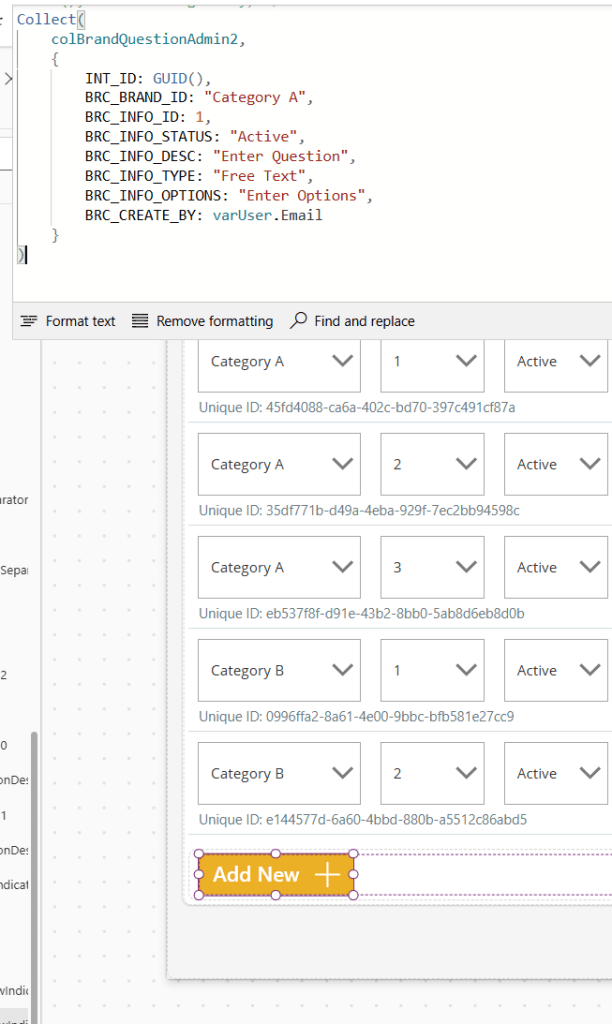
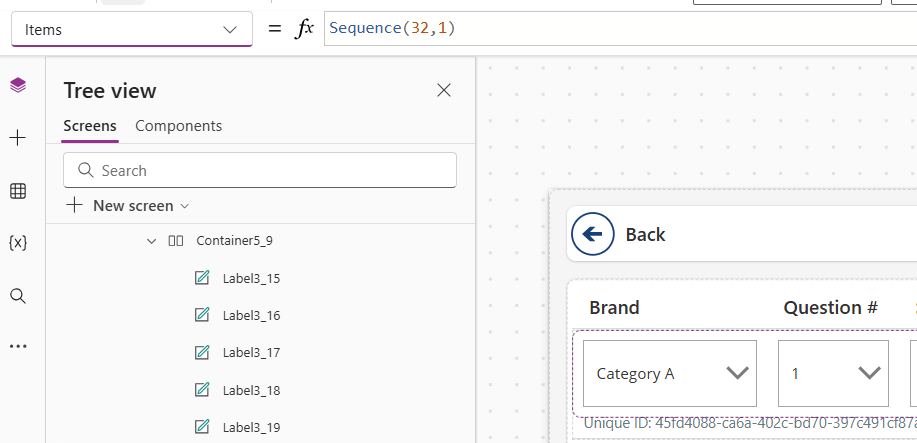
The Add New button adds a new record to the collection/table (note that you can absolutely create some logic to automatically set a Question# that is next in line, but as I am working only with a local collection here I skipped that part):
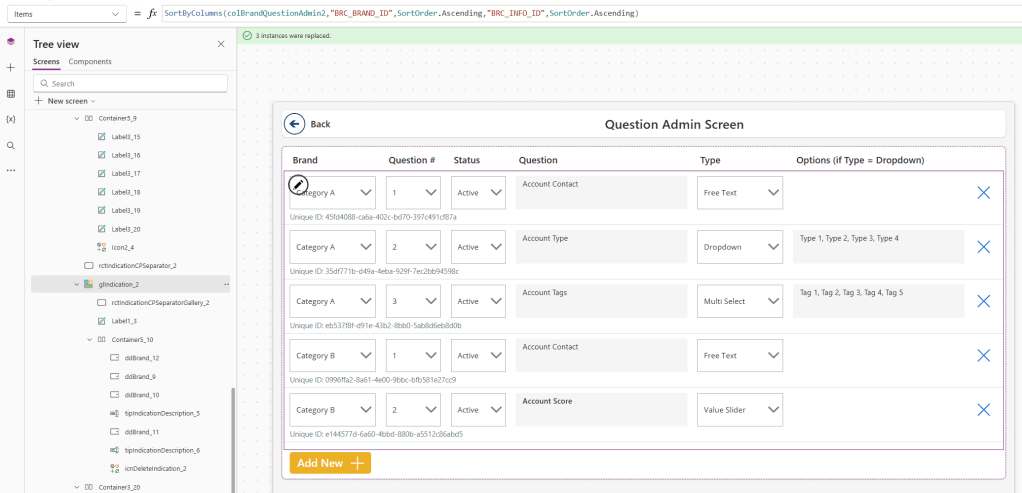
The gallery on the screen displays all records of the collection/table, and holds different types of input controls to define each column of the collection/table: Category, Question#, Status, Question, Type and Options:
Each dropdown control has its Items manually populated in this case, but in a real scenario you’d likely want to populate e.g. your Categories with a column from a dimension in your Data Warehouse.
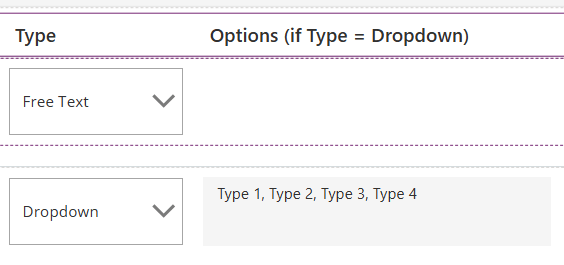
Where things get interesting is the Type Dropdown and the Options Text Input. Here you need to define which types of input the question should map to on the User Defined Input Screen. In my case I need to provide Free Text, Numeric, Value Slider, Dropdown and Multi-Select inputs:

The Options input field is only enabled when the Type is set to Dropdown or Multi-Select, and allows the defining user to add the options that will populate the Dropdown in question, by writing in comma-separated values:
There are more things I could show about this screen, but they are mostly flavour/housekeeping stuff, so I will cover them only briefly:
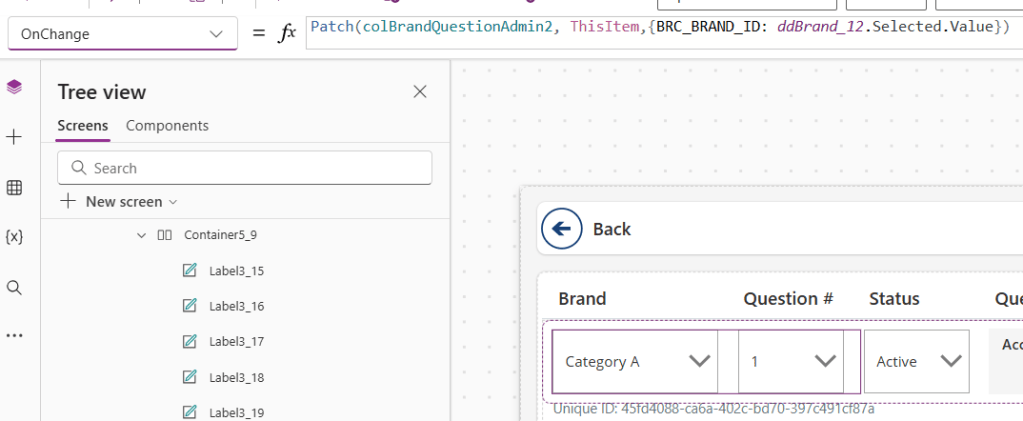
- I opted for using the “OnChange” property on all the input for saving edits made by the users:
- I included a feature to delete rows after creation:
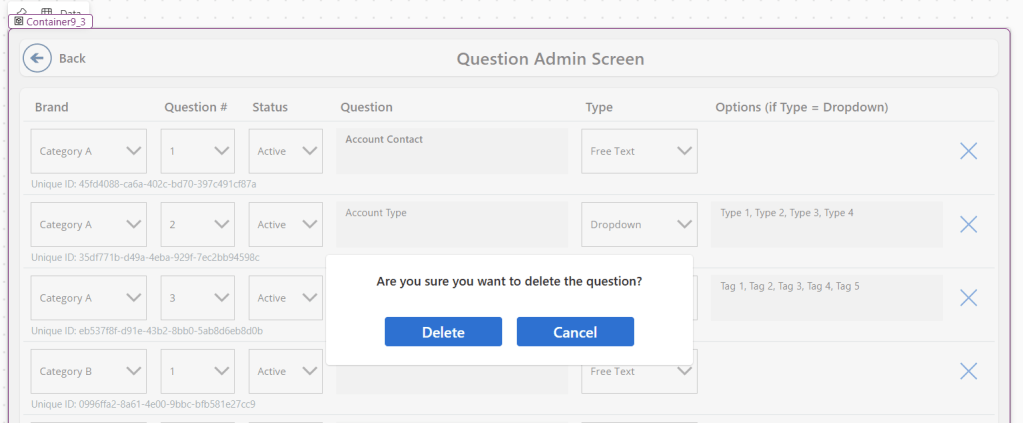
- And I also haven’t mentioned that I like to include a unique ID by using the GUID() function during the “Add Row” creation. This acts as a primary key on the table, and prevents errors if users accidentally define two questions with the same combination of Category and Number.
With all of this setup, I now have a working “Admin Screen” that I can allow certain users access to, to let them define all the questions they need, WITHOUT THE NEED TO INVOLVE THE POWER APPS DEVELOPER!
Creating the User Defined Input Screen
Now how do you then retrieve and display the correct questions and input types for the End Users?
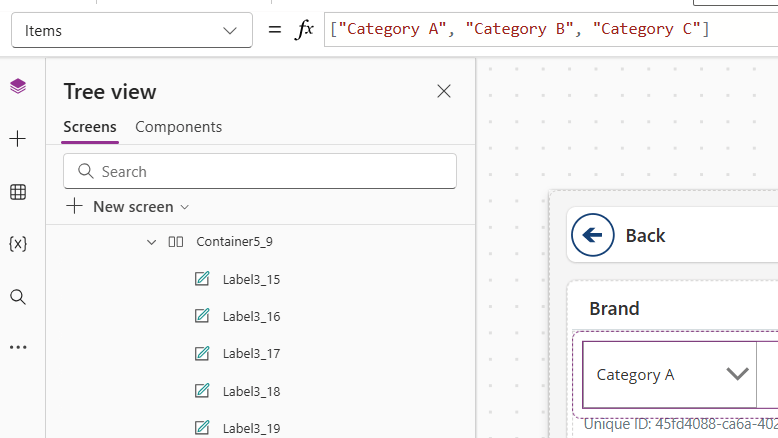
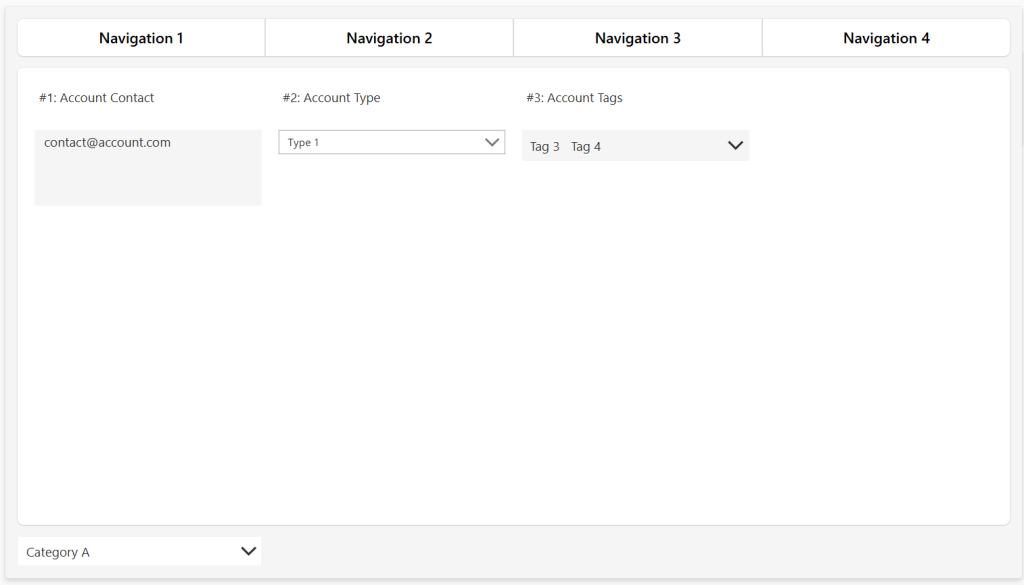
We create another Screen which takes a Category Input, retrieve the questions for the selected Category, and dynamically show the correct pre-built input control based on the Question Type.
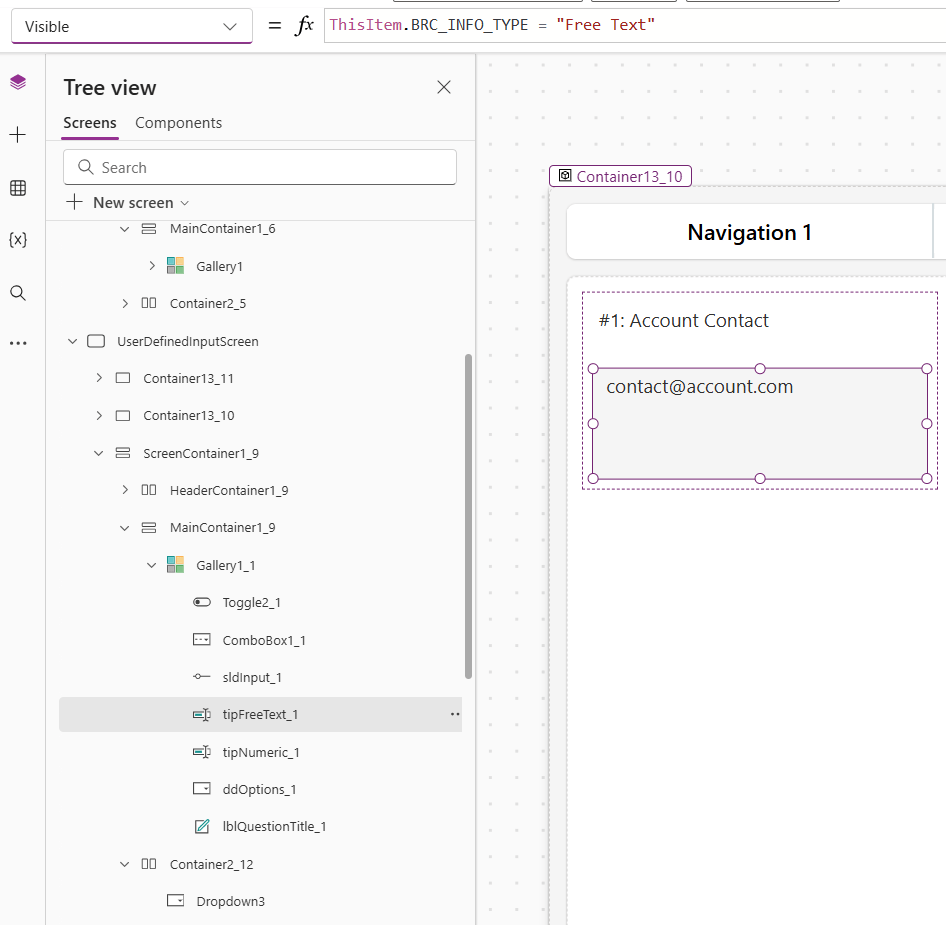
The way this screen works, is by creating a Gallery with all the different Input Types pre-defined, and then using the Visible property, checking for the Input Type in the current row of the underlying collection, and only displaying the relevant control:
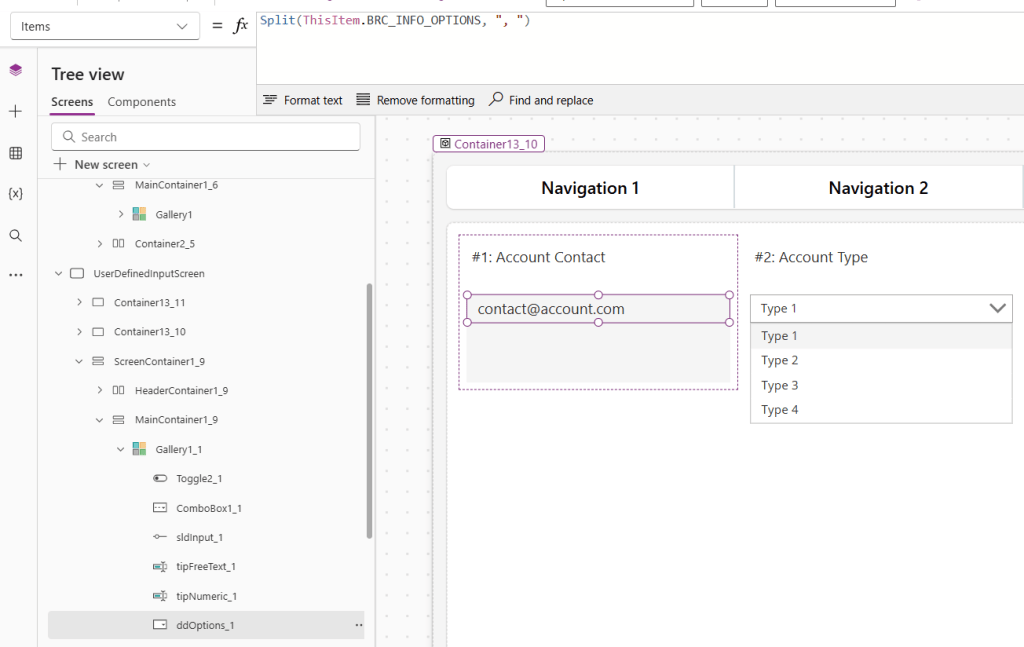
For the Free Text, Numeric input and Value Slider this is smooth sailing. But for the dropdown and multi-select combo box, I need to parse the comma-delimited “Options” field, by using the Split function:
Now what is used to populate the gallery? Well. We need a table which shows all the questions defined in the Admin screen. But we need to merge those questions with any answers already inputted by any previous users to the value table – which is obviously a different table from the one holding the questions.
So. We need to join the Question and the Value table together, and use that to populate the Gallery. Slightly complex, and my specific column names will be nonsensical to you, but looks like the following:
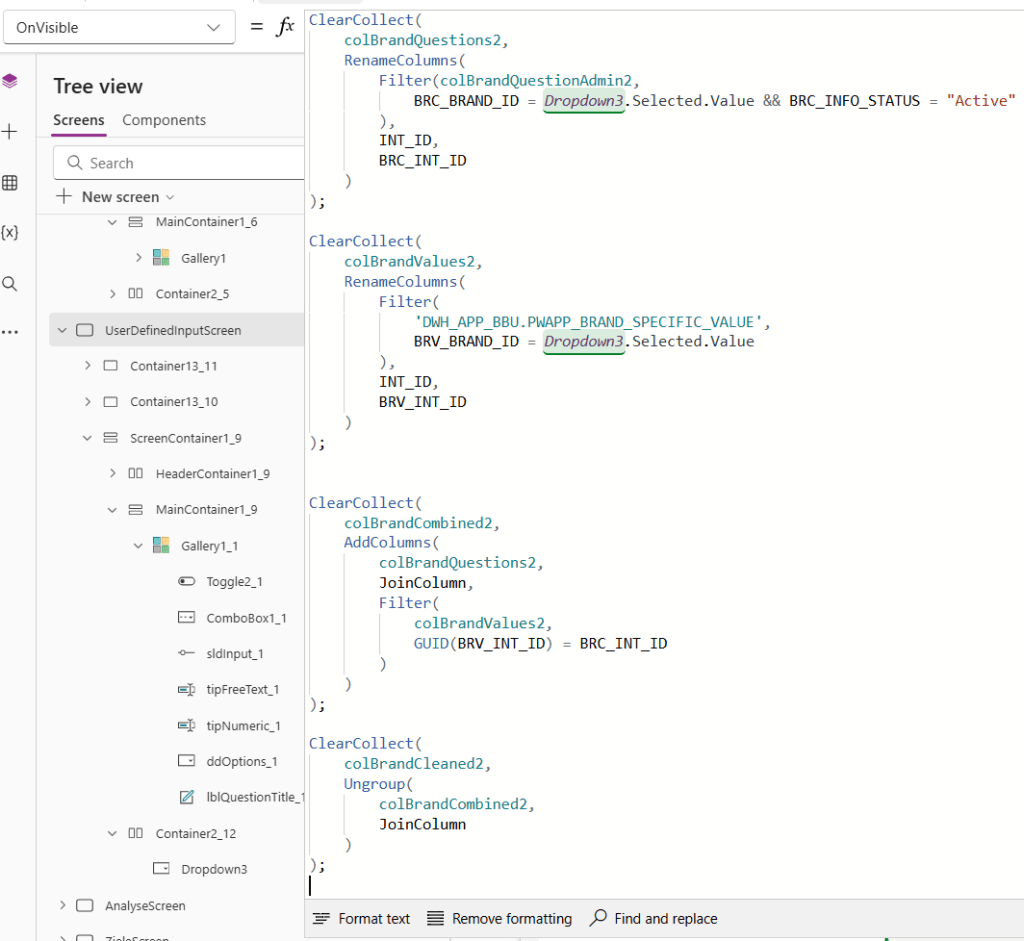
Note that in this case, I even filter both tables to only include questions and answers for the Category selected by the user. This Category is obviously best set automatically through user navigation in the app, but for this demo it is a manual dropdown selection by the user on the screen itself.
We can now put this combined collection on the Gallery Items property:

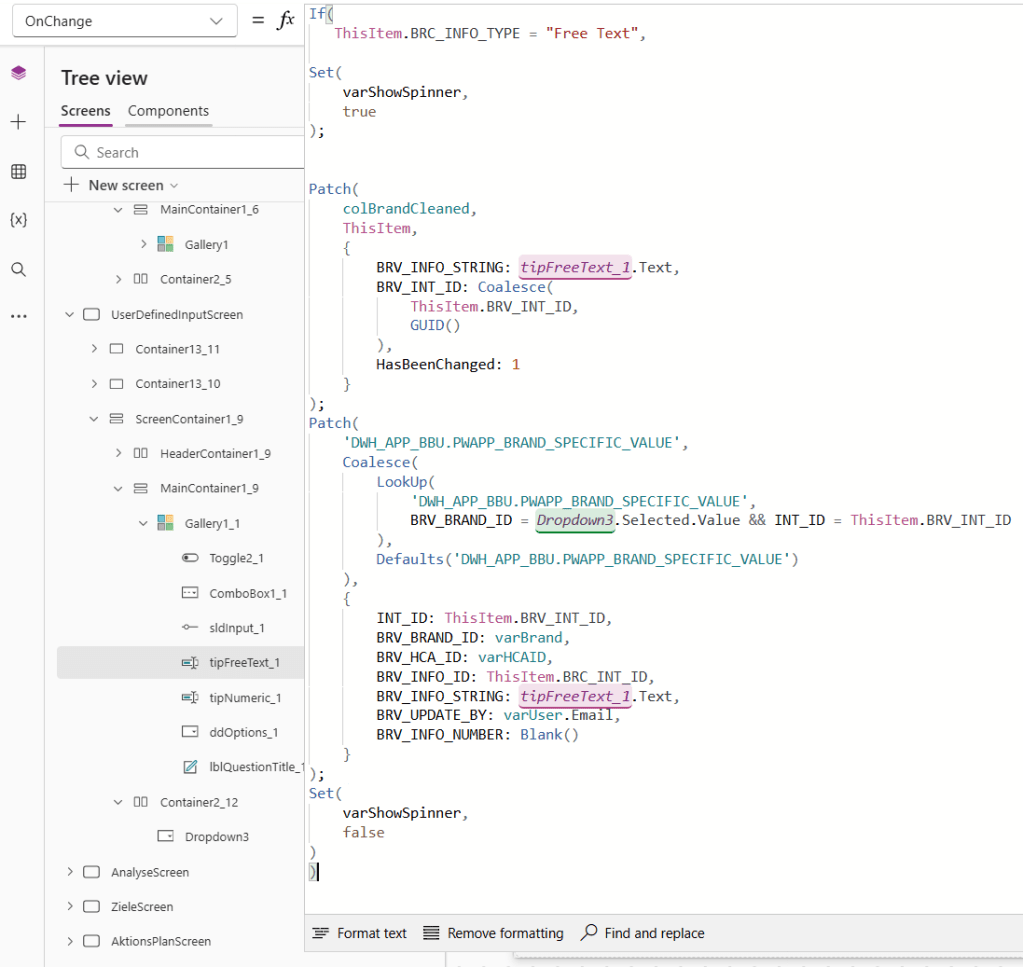
Make sure to set default values, and visibility properties for all the input fields, and then of course the “OnChange” property of each Input control needs to update both the local collection as well as the Destination Value/Answer table:
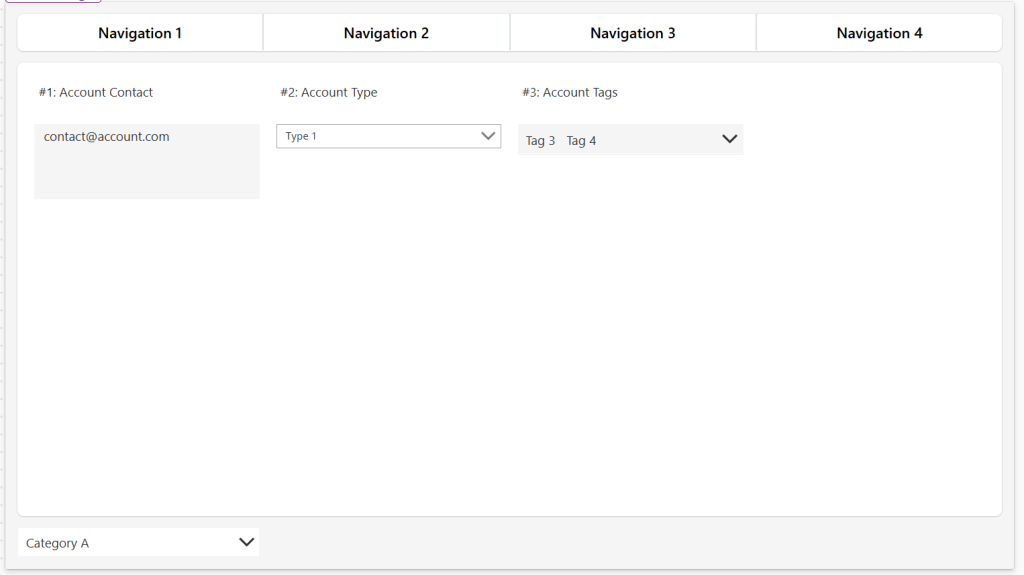
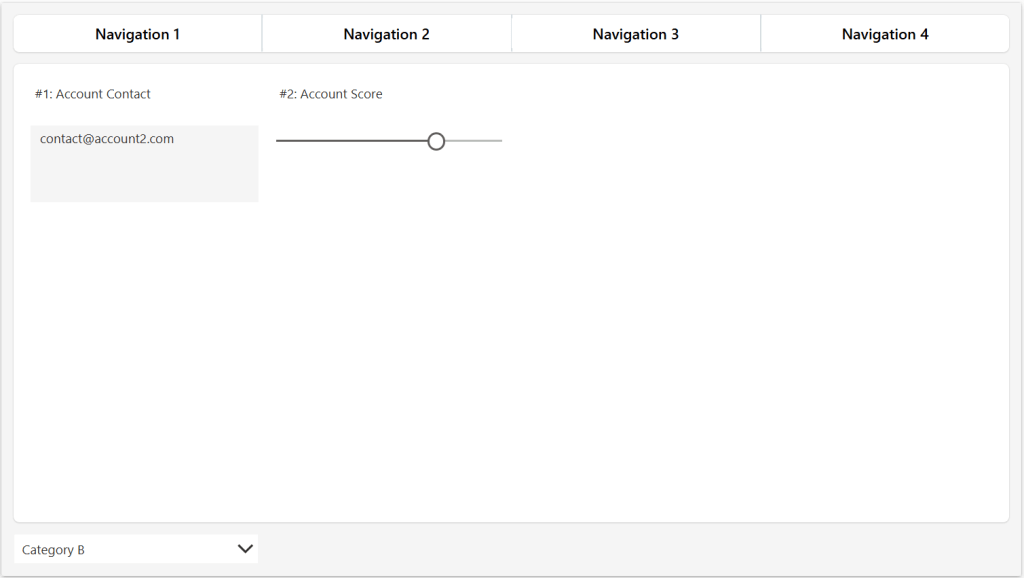
With all of this setup, sit back and enjoy your work. You’ve created a Screen which your Super Users / Admins can dynamically control themselves, which will display different inputs controls to the end user, based on their selection of Category, and the matching questions defined by the Admins:
Conclusion
It is not the easiest task in the world, but with clever use of collections, visibility properties and Power FX, we can create a dynamic Canvas Power App requiring a minimum of developer intervention once setup.
Obviously, whenever new input controls are desired, the developer needs to take the stage, defining the new type on the Admin Screen and setting up the pre-created input control on the User Defined Screen. But I think we can manage that.
Did you like the solution?
Do you have other solutions to achieve the same thing? Then I’m eager to hear from you.


Leave a comment