

Introduction
The past two weeks, this blog has outlined how:
- Users can get started with Version Control in its simplest form with the GIT Integration for Power BI & Fabric Workspaces: https://downhill-data.com/2024/06/18/simple-version-control-in-fabric-power-bi-with-git-integration-a-beginners-guide/
- Teams can do collaborative development in Power BI & Fabric with Version Control & Merge Conflict Handling with the GIT Integration: https://downhill-data.com/2024/06/25/collaborative-power-bi-fabric-development-for-teams-w-git-integration/
This week, we will look at completing the Application Lifecycle Management of those solutions, by building on top of the GIT Integrated Workspaces with the built-in Deployment Pipelines.
The benefits of leveraging Deployment Pipelines are many, including:
- Improved stability of reports, due to the separation of End-User facing items and items currently being worked on.
- Reduced deployment risk, due to the automation potential and smaller risk of manual error
- Improved development and testing experience, especially if leveraging deployment rules.
Setting up TEST, PROD and the Deployment Pipeline
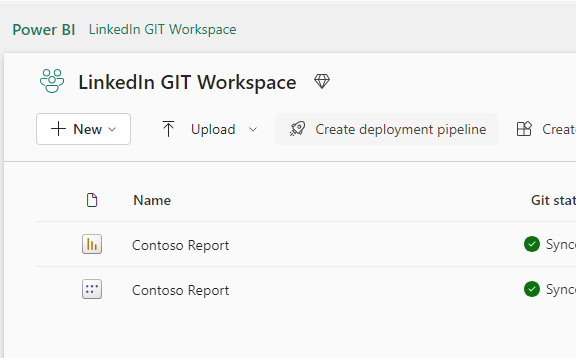
Before getting started, make sure you have a DEV Workspace, either personal or shared, which is hooked up to an Azure DevOps repository through the GIT Integration feature. If you do not have this already, follow one of the two links mentioned in the introduction to get started.
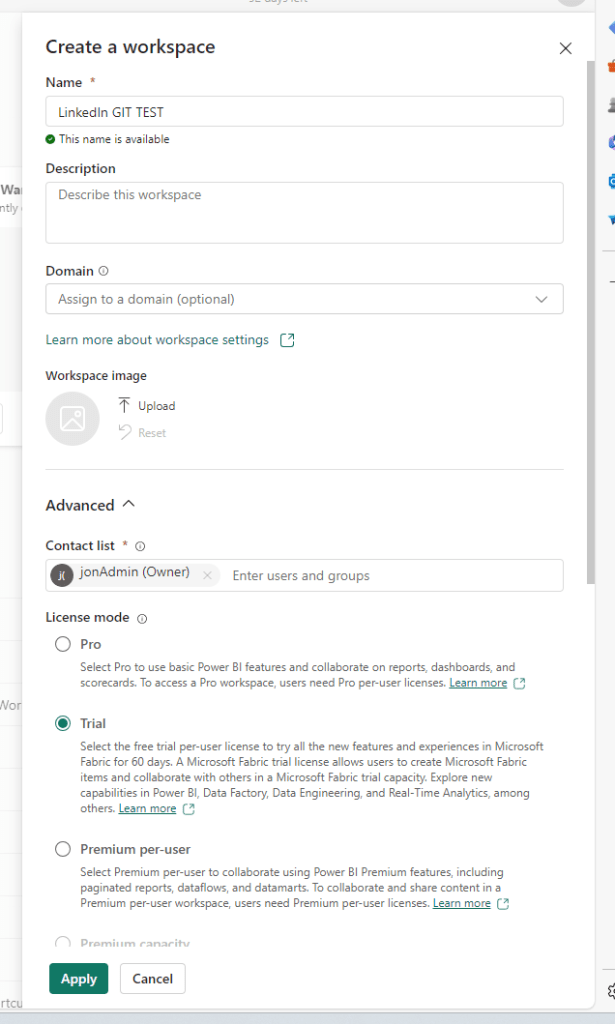
Next, we will create and setup our Deployment Pipeline as well as TEST and PROD workspaces. Start by creating two new workspaces for TEST and PROD:
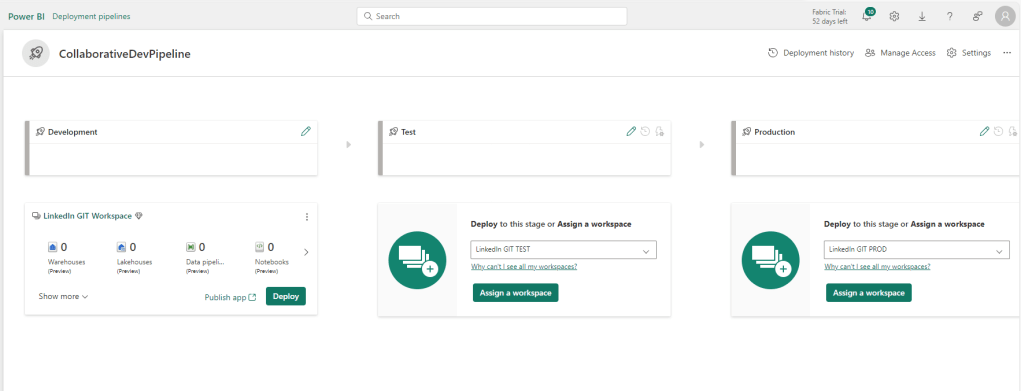
Then create a new Deployment Pipeline, and point each stage of the Pipeline to each of your three workspaces.
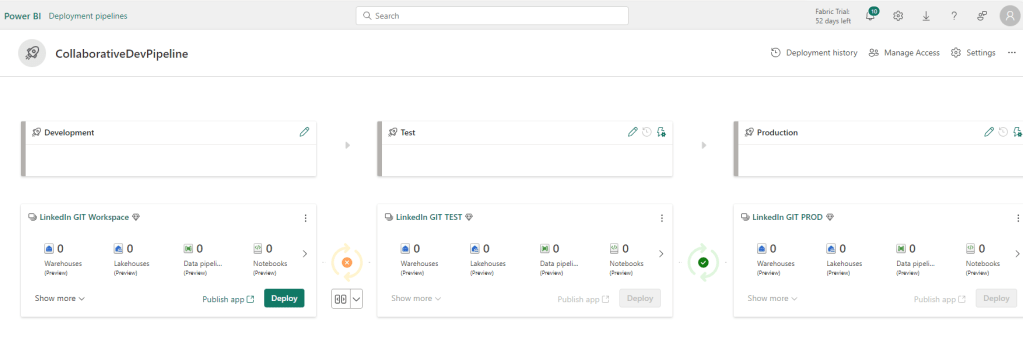
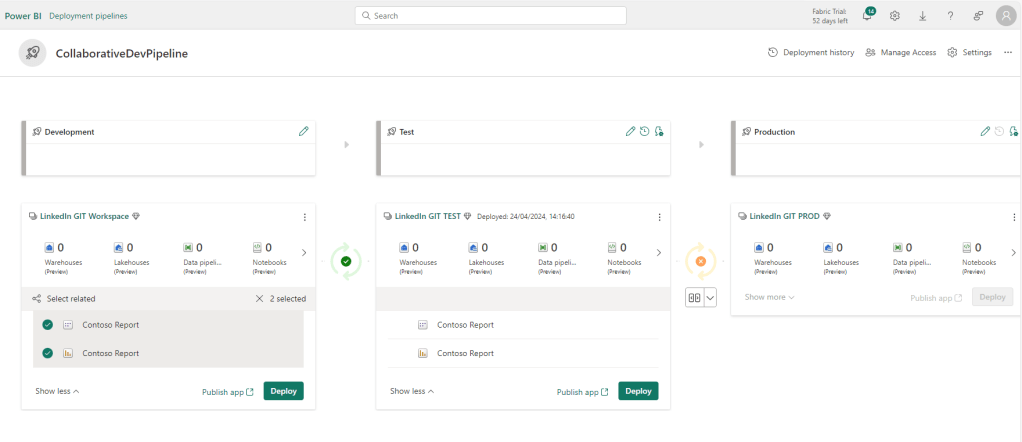
Comparing between the stages allows us to view differences, and select which items to deploy:

And a simple click allows us to deploy to first to TEST:
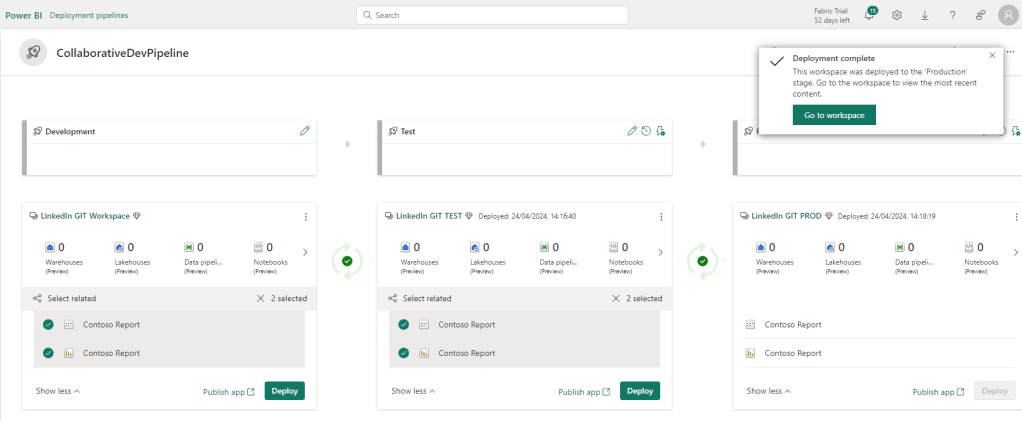
And post-review in TEST, we can do the same Compare > Deploy to production:
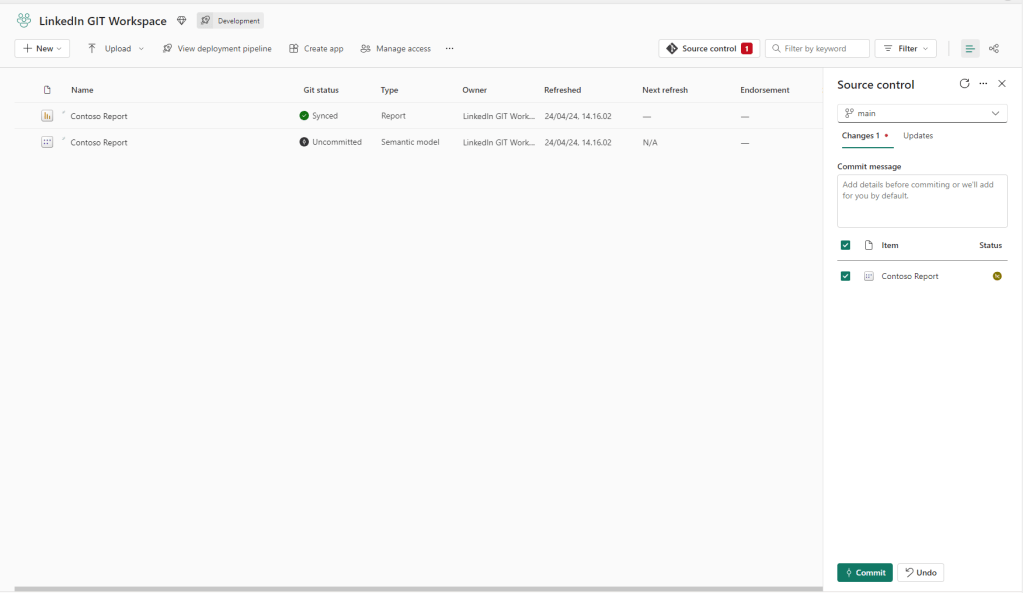
If we make a change to the data model in the Shared DEV workspace, by using the web model authoring (e.g. by adding a new measure), or one of the proposed Team Collaboration architectures from last week’s blog:

Our workspace will recognize a difference between our current workspace item, and the one stored in GIT. Hence, we can now both commit the change to our GIT repository:
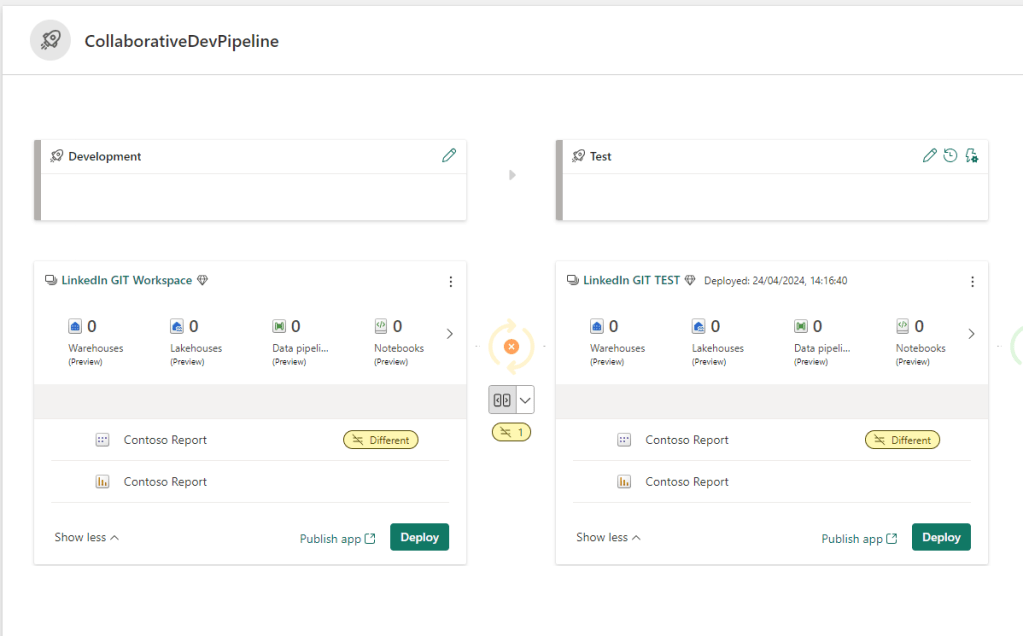
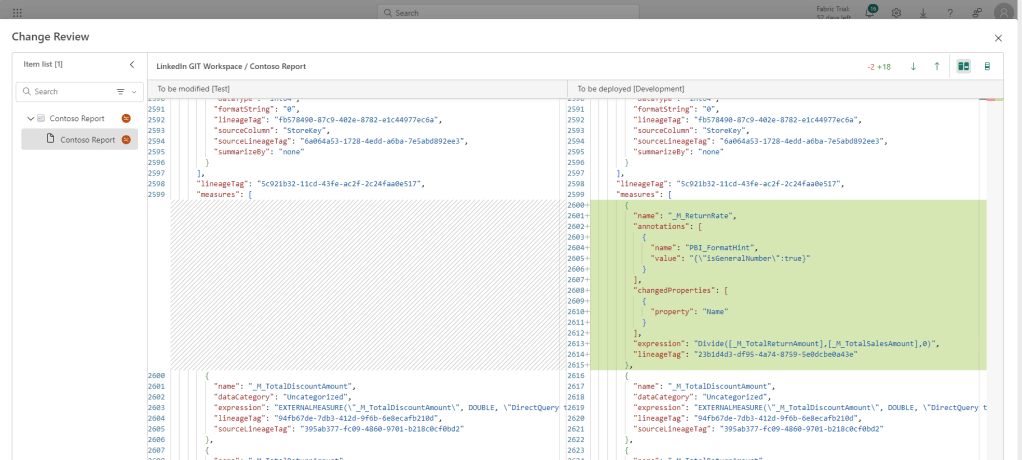
And the Deployment Pipeline will now recognize a difference between the DEV and TEST workspaces, and also allows us to view details about the difference, letting us verify the changes before deploying through the stages. :
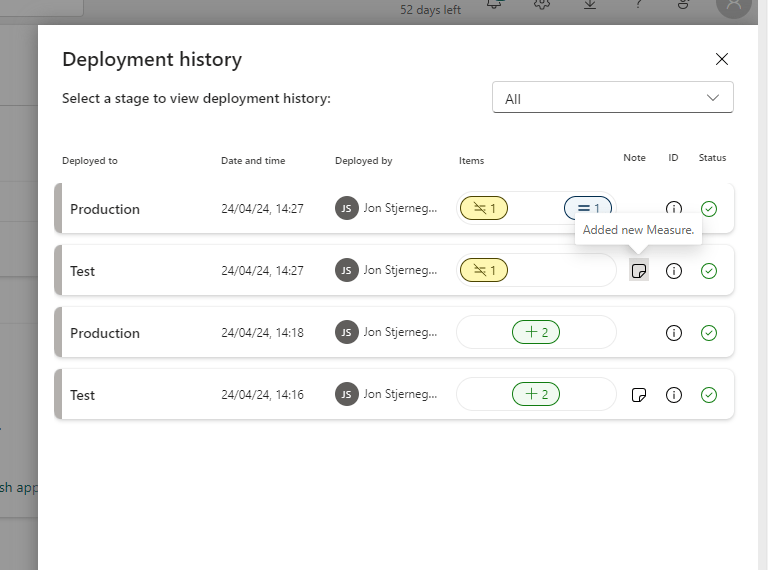
The deployment history in the pipeline provides a good overview of changes made, especially if you are diligent about adding notes to your deployments:
In essence, that is how the deployment pipeline works, and how you will be able to manage new releases between workspaces!
Improving your content lifecycle management with deployment rules:
After understanding how basic deployment works, it’s time to familiarize the feature which truly elevates the development and testing experience: Deployment Rules.
Deployment Rules in Deployment Pipelines are parameters which can dynamically alter the items being deployed, depending on the stage they are in. They come in two varieties:
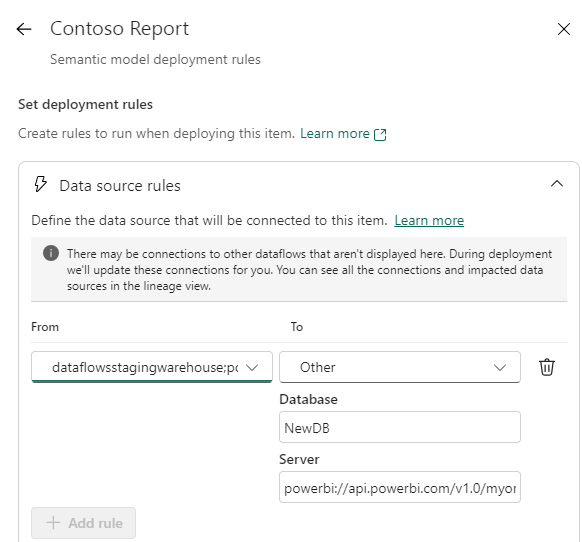
- Data Source Rules, which allow you to dynamically change Data Sources in your semantic model, allowing you to automatically change to a Test DB when deploying to Test, and to a PROD DB when deploying to PROD.
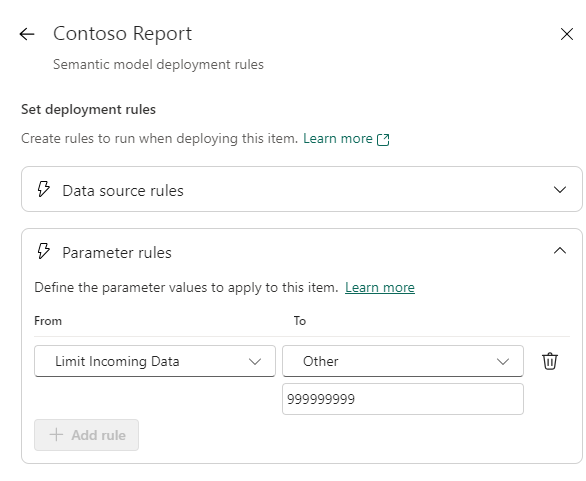
- Parameter Rules, which allow you to dynamically alter values of parameters defined in your Power Query. I personally use this to remove any Row Limits I might have set up in my Development file, allowing me to use the full dataset in TEST and PROD, while developing on a smaller version of the dataset.
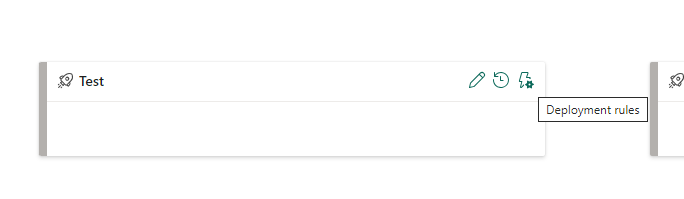
You setup the rules by first selecting an eligible item (not all Fabric / Power BI Items support deployment rules. See the list here: Create deployment rules for Fabric’s Application lifecycle management (ALM) – Microsoft Fabric | Microsoft Learn
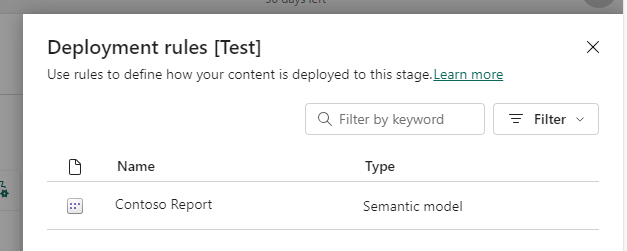
Next, you choose the rule to apply, and define the rule.
For Data Source Rules that involves remapping existing data source connection strings to new connection strings:
For Parameter Rules it involves simply writing in a new hardcoded value for the parameter:
Applying Deployment Rules to your stages offers huge Quality of Life improvements for developers, as you can easily ensure that your Development Environment can be optimized for development speed, while still ensuring TEST and PROD to behave as expected without manual intervention.
Keeping Reports and Semantic Models in separate workspaces and pipelines
If you are following Best Practice guidelines for developing Power BI Semantic Models and Reports, you are probably keeping your Semantic Models and your Reports in separate workspaces.
Dealing with this in relation to Deployment Pipelines is luckily no problem.
You will simply create two TEST & PROD Environments, as well as two Deployment Pipelines: One for your models, and one for your reports.
A neat feature in Deployment Pipelines is that they are auto-binding, meaning if you deploy a Report from e.g. DEV to TEST that depends on a Semantic Model that is in a different Pipeline, it will automatically rebind to the Semantic Model in the TEST stage of the other Pipeline. It will even stop you from deploying, if you have not deployed your model to TEST yet.
In case of deployment rules, you would then set that up on your Semantic Model Deployment Pipeline, and not on your Report Pipeline.
Final Remarks
Hopefully this article gave you a good understanding of getting started with Content Lifecycle Management and deployments using the built-in Deployment Pipelines.
This is only one way of handling deployments, but the strengths are that it is easy to get started with, and it is built-in to the service.
More advanced users may want to have a look at using Azure Pipelines for further automated testing and more advanced deployment rules.
In addition, a topic not touched by this blog, is the Security and Permission aspect of pipelines and workspaces, which I hope to cover in a future blog.


Leave a comment