Introduction
Three years ago, write-back to Power BI was my gateway into the Power BI community.
Power Apps embedded into Power BI, enabling write-back to Sharepoint, Azure SQL and Fabric, and sharing those solutions with the community, have always been some of the most fun I’ve had with “work”.
However.
While Power Apps are relatively easy to build, the solution architecture quickly becomes complex. Especially when you consider governance, CI/CD and licensing, all of which balloons in size when you are forced to integrate with a new platform (Dataverse/Power Platform) to solve a seemingly small issue in a Power BI report.
Recently, Translytical Task Flows were announced in Public Preview (Understand translytical task flows – Power BI | Microsoft Learn)
This Power BI feature allows for triggering of, and passing of parameters to, User Data Functions (UDFs) in Microsoft Fabric. Functions which through Python allow you to call anything. Including of course, making CRUD operations on data destinations in Fabric.
Today on the blog, we cover the basics of how to create your first Comment/Annotation app for your Power BI reports which writes data back to your Fabric/OneLake backend, with the only license requirement being your existing Fabric Capacity and Power BI licenses.
Pre-Requisites
Before we get started, you need to ensure the following pre-requisites are met:
- You have a Fabric Capacity available.
- The following settings are enabled in the tenant settings of your Fabric Admin Portal:
- Users can create Fabric items
- SQL database (preview)
- User data functions (preview)
- Your Power BI Desktop is fully updated, and the Translytical Task Flows preview feature has been enabled in File > Options and settings > Options > Preview features.
Solution Architecture / Item Overview
Your Comment solution will consist of three Fabric Items:
- A SQL Database in Fabric
- We use the SQL Database item in Fabric as opposed to Lakehouses and Warehouses, as it is by far the easiest to get working with Translytical Task Flows (TTFs).
- This Item will store all data used for our semantic model, including the table used for storing our Comments.
- In theory, we could use the SQL Database just for our comments, and have the rest of our semantic model in a Lakehouse or Warehouse, but for simplicity of the guide, we are keeping everything in one item.
- Stay tuned for future blogs looking into these architecture patterns, including integration with other backend items.
- A User Defined Function
- User Defined Functions (similar to Azure Functions for those familiar), are Python scripts which are parametrizable and may be called from other applications.
- We use this item to execute our CRUD (Create, Update, Delete) commands against the SQL Database item, and parameterize it with context and inputs provided by the user in Power BI.
- A Power BI Report/Semantic Model
- The Power BI report is the only interface that the User will see.
- The report will look like any other Power BI report, but have options and buttons for the user to input data and trigger the UDF.
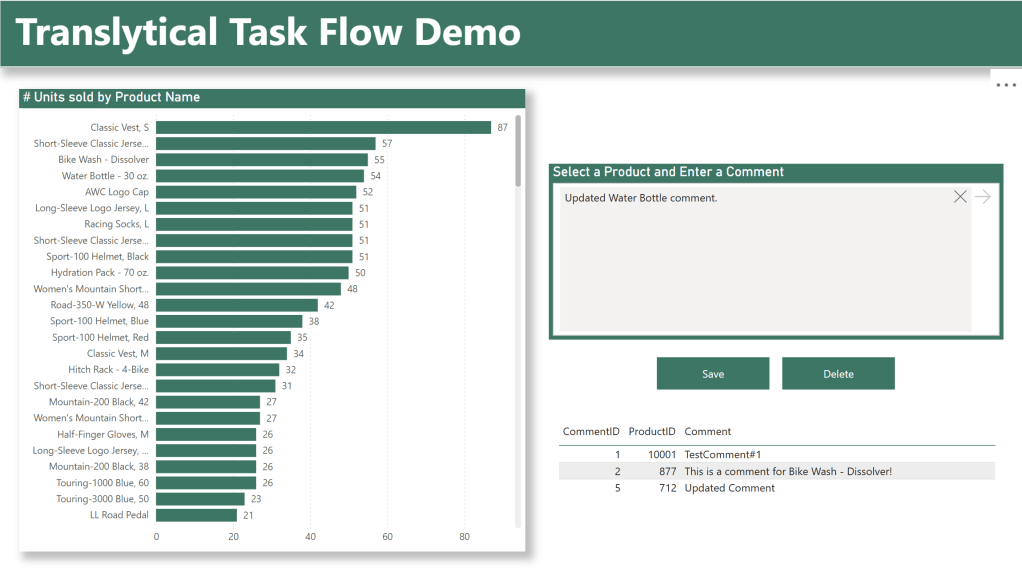
- In this simple report example, users will see the number of units sold by product, and be able to input a comment stored at the Product level. This could of course be different in your solution.
- The underlying Semantic Model uses DirectQuery in order to reflect the changes made by the user LIVE.
- DirectLake and Import mode could still work, but the user would not see any changes made in the backend until the reframing (~1 min delay) or refresh ( for the semantic model has occured for each storage mode respectively.

Creating the SQL Database
Start out by creating a SQL Database, and either load it up with your own data, or use the sample data provided by Microsoft:
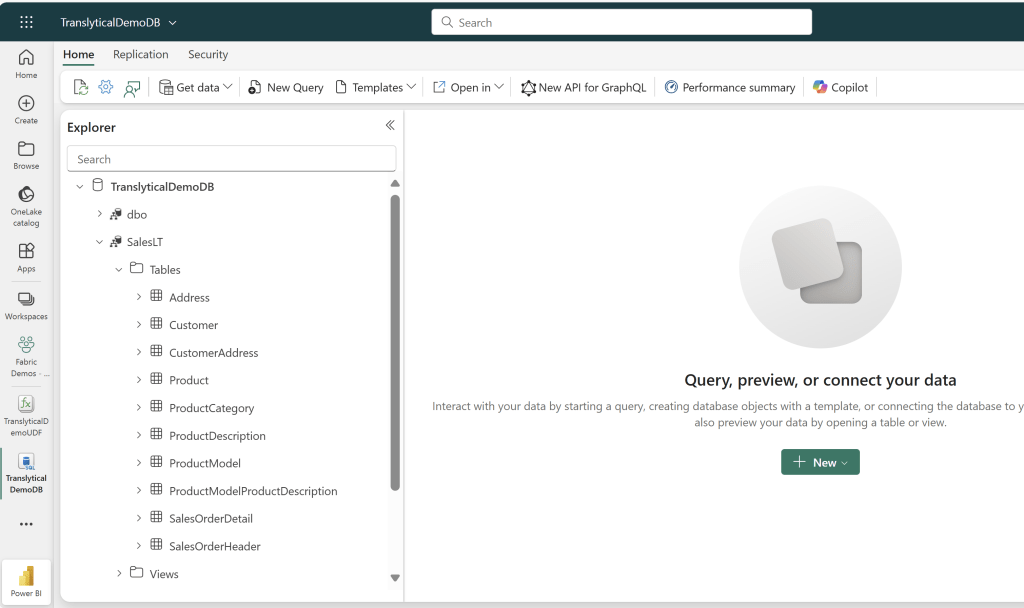
Take note of any schema names, as they are important for syntax when creating our UDF. In my case, the dummy data has been created in the schema [SalesLT].
Now this data model obviously does not include a column anywhere to store the comments. There are many ways you could include this, but as we in this solution will be storing comments at a Product Level, I will add a simple three column table to my database schema, with columns “CommentID”, “ProductID” and “Comment”:
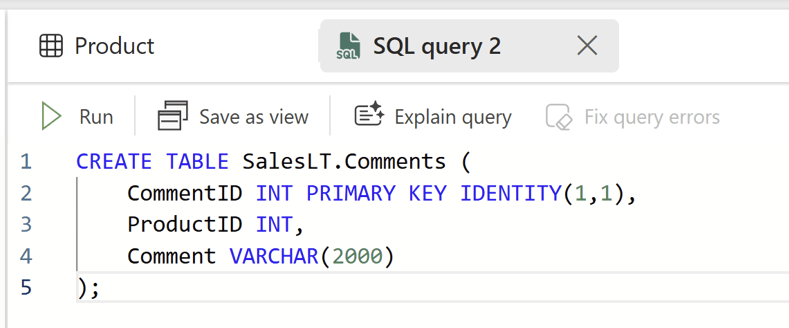
Notice how I designate CommentID as an Identity column and the Primary Key. This makes things much easier, and is one of the reasons why SQL Databases are easier to get started with write-back for, in comparison with Warehouses and Lakehouses (although Warehouses are getting Identity columns soon!).
And that’s actually it. This was all the work we needed on the backend!
Creating the User Data Function (UDF)
Next up, we need to setup our UDF.
I will divide this section into four parts: General Setup, Create New Records, Update Existing Records and Deleting Records.
General Setup
To get started with your UDF, we need to create it and connect it to the SQL Database just created.
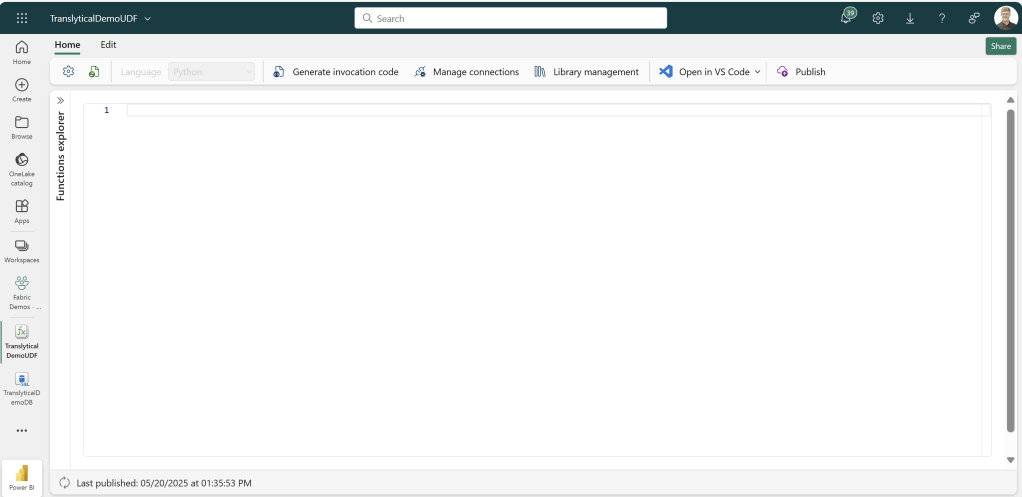
First create a new UDF item:
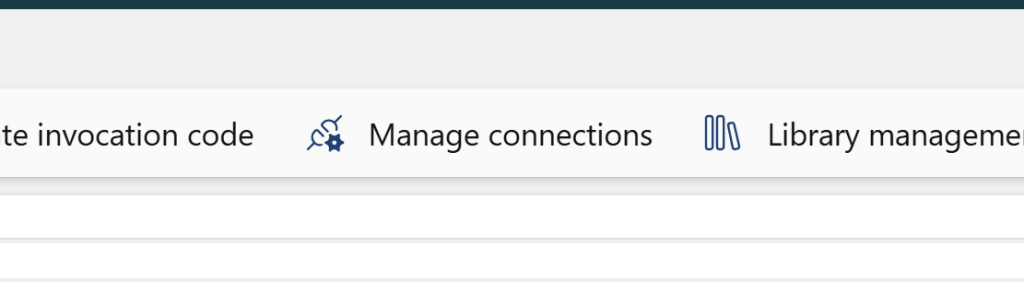
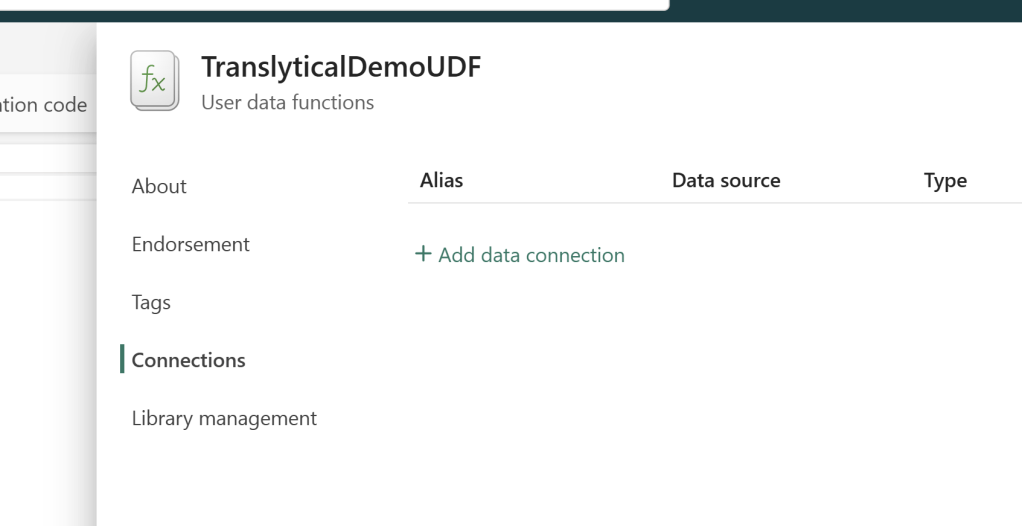
Then find the “Manage Connections” option at the top, add a new Connection and select the Database you just created (Yes its that easy! It’s all just GUI and stuff so far..).
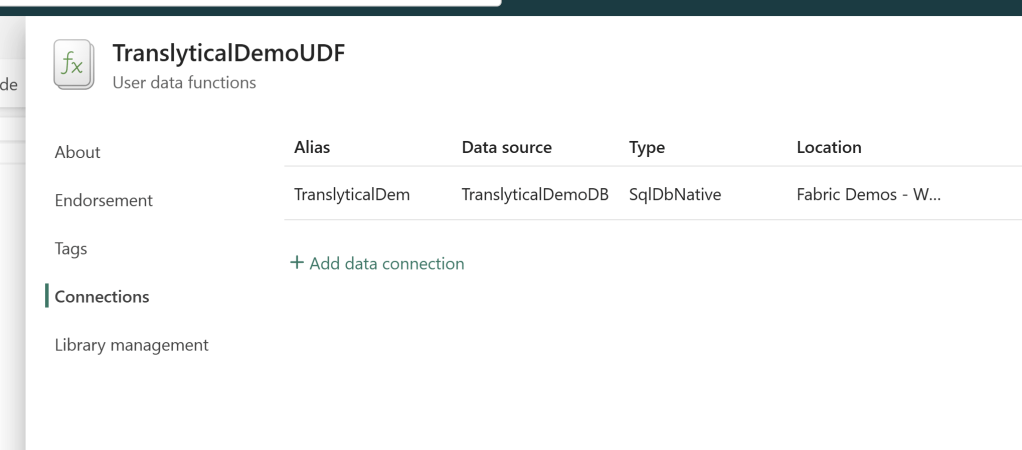
Take note of the Data Connection “Alias”, as we need that to reference our data source in the code.
Creating New Comments
Sujata Narayana of the TTF team at Microsoft has some pretty cool UDF examples on her github that you can use for inspiration: Example User data functions for Translytical task flows · GitHub
However I wanted something even simpler for this guide. Hence, I relied largely on some of the built-in code samples available from the “Samples” section in the Edit mode of your UDF:

For this example, choose “Write one row of data into a table in SQL database, and the following code will appear:

Notice the red squiggle under the “UDF” tag? We need to import the necessary libraries, and define the UDF variable. I stole the following code snippet from the Microsoft Docs:

Now we need to modify the code to our needs.
Update the Alias on line 11 to the alias of your Data Connection (the one you noted before – otherwise find it in “Manage Connections”), and feel free to customize the name of the function too.
Then update the parameters to only include columns that you need for your app. For this app, we need to get the ProductID and the Comment from Power BI, in order to pass the values to the backend:

Further down in the code, the part of the sample which suggests creating the table can be deleted, as we already created ours.
Then update the Insert Data SQL statement, to match the Schema, Table and Column names of your Database:

Finally, add an appropriate return message to display for the user:
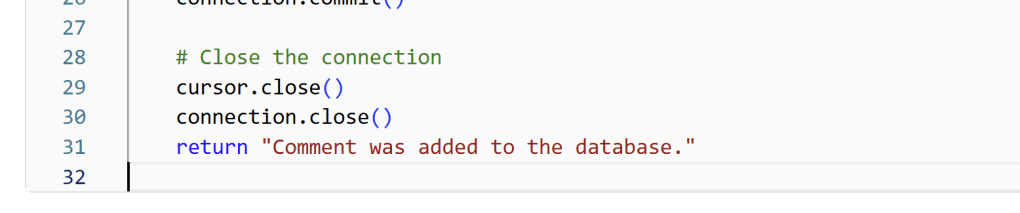
And the full UDF should look something like the following:

import fabric.functions as fn

udf = fn.UserDataFunctions()

@udf.connection(argName="sqlDB",alias="TranslyticalDem")
@udf.function()
def write_comment_to_sql_db(sqlDB: fn.FabricSqlConnection, productID: int, comment: str) -> str:
    # Replace with the data you want to insert
    data = (productID, comment)

    # Establish a connection to the SQL database
    connection = sqlDB.connect()
    cursor = connection.cursor()

    # Insert data into the table
    insert_query = "INSERT INTO [SalesLT].[Comments] (ProductID, Comment) VALUES (?, ?);"
    cursor.execute(insert_query, data)

    # Commit the transaction
    connection.commit()

    # Close the connection
    cursor.close()
    connection.close()
    return "Comment was added to the database."
Click Publish in the Top Right corner of the editor, wait for the success message, and the function should appear in the Functions Explorer:

Updating Existing Comments
Now we have a function which allows us to create new comments. But what about updating existing ones? Let’s create a new function which allows us to either Create OR update a comment, depending on whether one already exists.
Within the same UDF, we can define additional functions using the “def” command. I copy pasted my entire first Function, and renamed the copy into “writeandupdate_comment_to_sql_database”:

Now we need a little piece of logic to determine whether to Create or Update. First, let’s look up if there are any comments in the Comment table with the selected ProductID:

And then some Conditional Logic to first update the existing comment if there is a match:

And we can reuse all the code from the “Create Comment” example as the else-statement:

The full code is as below:
@udf.connection(argName="sqlDB",alias="TranslyticalDem")
@udf.function()
def writeandupdate_comment_to_sql_db(sqlDB: fn.FabricSqlConnection, productID: int, comment: str) -> str:
    # Replace with the data you want to insert
    data = (productID, comment)

    # Establish a connection to the SQL database
    connection = sqlDB.connect()
    cursor = connection.cursor()

    # Lookup Existing Records
    lookup_query = "SELECT * FROM [SalesLT].[Comments] WHERE ProductID = ?;"
    cursor.execute(lookup_query, productID) # productID is inserted as the single variable in the query
    lookup = cursor.fetchone() # Fetch and store existing record

    if lookup: # If the lookup is not empty, update the record in the database
            update_query = "UPDATE [SalesLT].[Comments] SET Comment = ? WHERE ProductID = ?"
            cursor.execute(update_query, (comment, productID))
            connection.commit()
            cursor.close()
            connection.close()
            return "Comment has been updated!"

    else: # If the lookup is empty, create a new record in the database
        insert_query = "INSERT INTO [SalesLT].[Comments] (ProductID, Comment) VALUES (?, ?);"
        cursor.execute(insert_query, data)
        connection.commit()
        cursor.close()
        connection.close()
        return "A new comment was succesfully added."
Deleting Comments
We also want to be able to delete comments. Again, we can continue in the same UDF item, using the “def” keyword to define a new function.
I call it “delete_comment_to_sql_db”, and modify the parameters to omit Comment, as we don’t need it for this function:

Then, we can use the same Lookup and if/else structure from before, but simply modifying the true portion of the logic to include a DELETE statement rather than an UPDATE, and modify the Else-clause to signal the user that nothing has been done.
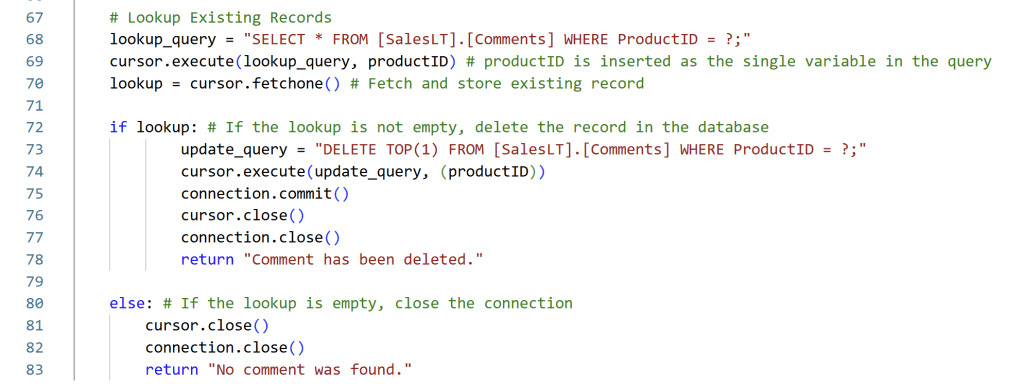
The code for the Delete function is as follow:
@udf.connection(argName="sqlDB",alias="TranslyticalDem")
@udf.function()
def delete_comment_to_sql_db(sqlDB: fn.FabricSqlConnection, productID: int) -> str:

    # Establish a connection to the SQL database
    connection = sqlDB.connect()
    cursor = connection.cursor()

    # Lookup Existing Records
    lookup_query = "SELECT * FROM [SalesLT].[Comments] WHERE ProductID = ?;"
    cursor.execute(lookup_query, productID) # productID is inserted as the single variable in the query
    lookup = cursor.fetchone() # Fetch and store existing record

    if lookup: # If the lookup is not empty, delete the record in the database
            update_query = "DELETE TOP(1) FROM [SalesLT].[Comments] WHERE ProductID = ?;"
            cursor.execute(update_query, (productID))
            connection.commit()
            cursor.close()
            connection.close()
            return "Comment has been deleted."

    else: # If the lookup is empty, close the connection
        cursor.close()
        connection.close()
        return "No comment was found."
Summary
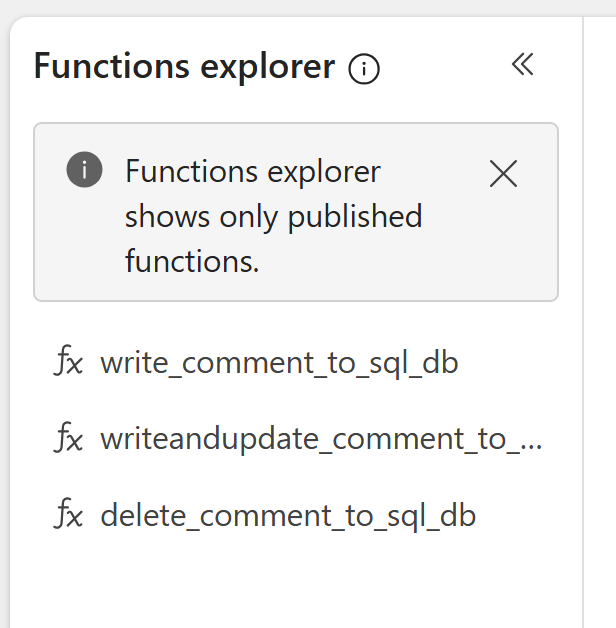
After publishing, I have three functions in my UDF (although I will actually only need the latter two…), and I can now use these within Power BI:
Creating the Power BI Report and Setup the Translytical Task Flow
Now we need to create our Power BI report.
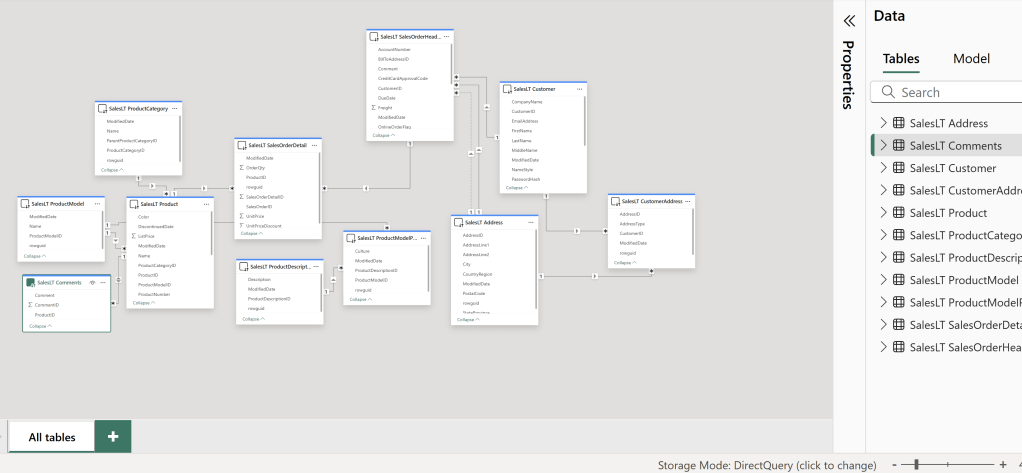
From Power BI Desktop, connect to all the data that you need for your report, including the Comment table, and set it up as a DirectQuery connection for the best results:
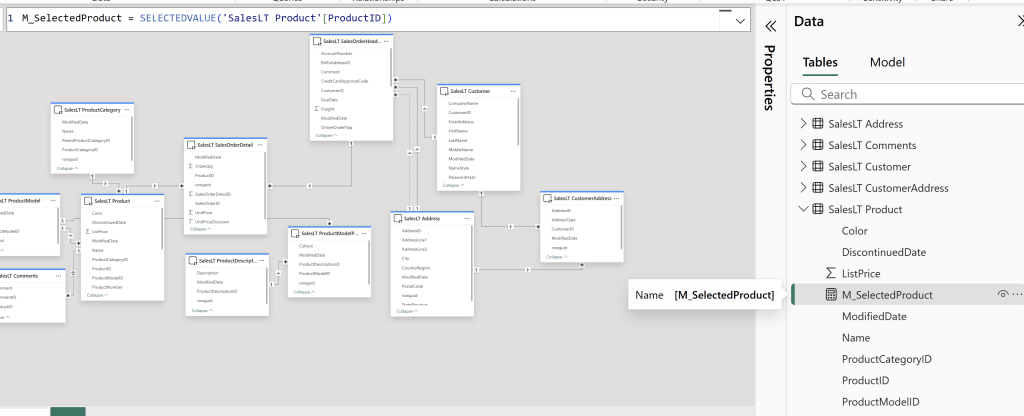
In this model, I have not done any excessive modeling, but I have created the following measure, which is necessary for passing the filter context of ProductID to the UDF in the following steps. If you are using other columns as well, make sure to create additional measures using SELECTEDVALUE() to capture this information:
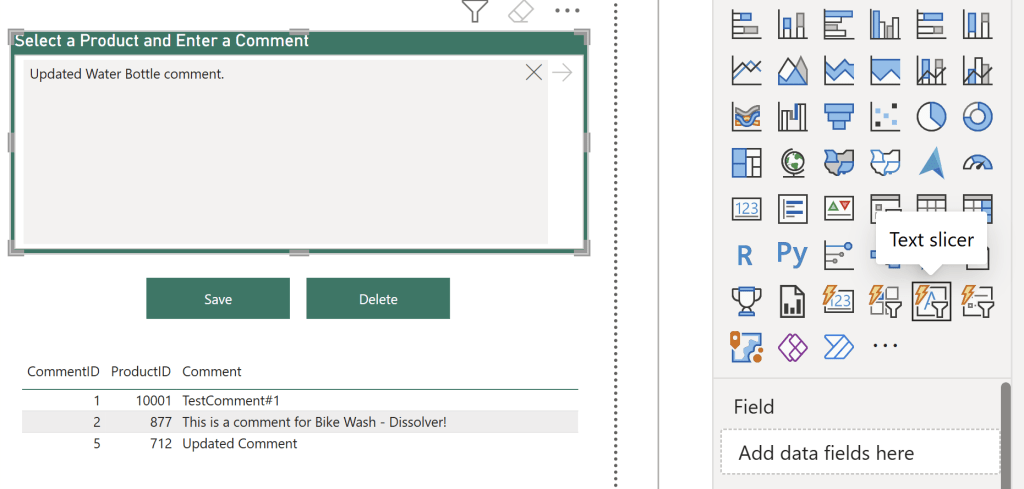
How you want to design the report itself is up to you, but I’ve build what you see below:

On the left hand side, the user will select a Product (and consequently filter the model down to a single ProductID, which is being picked up by the measure I created before). This is one of the ways that the user can provide inputs to the UDF, as we can pass the value of the measure to the UDF.
The other way the user can provide input, is through the three new Slicer types: Text Slicer, List Slicer and Button Slicer. For this demo, I am using a Text Slicer (we will explore the other types in future posts, so as to not complicate things further today):
The slicer itself I’ve not done much to customize, but notice that I have omitted adding data fields to its’ field well. On the Formatting tab I’ve just altered some coloring, its’ hint text and its’ title.
This Slicer will now allow users to write raw text comments to be passed to the UDF. And how will that happen? Through the Save button of course.
Below the Slicer I’ve added two blank buttons: One for Saving and one for Deleting.
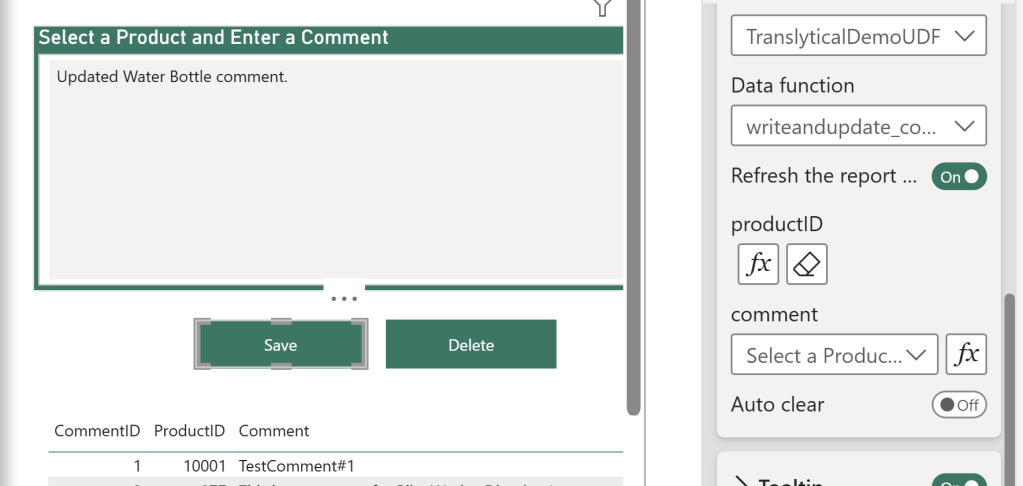
For each button, you need to enable the “Action”, map it to the new “Data Function” type (which is only available if you enabled the Translytical Task Flow preview feature in the Power BI Desktop settings), and point it to the Workspace, UDF and specific function you want it to run.
I am mapping my save button to the “writeandupdate” function.

After selecting the function, any parameters from the UDF will show up in the menu too, for you to map.
For the productID, choose Conditional Value, and point it to your Calculated Measure created before.
For the Comment, choose the name of the Text Slicer you created. Also feel free to enable the “Refresh the report automatically” and “Auto clear” options. It should look something like this:
For the delete button, simply map the button to the other action, and again map the ProductID measure to the ProductID parameter.
Below the buttons, I added a small table with the comments created. Comments will show up live here as they are inputted/deleted:
Wrap Up
That’s it! You have your own Fabric Native write-back extension for Power BI!
Now is this TTF (Translytical Task Flow) fool proof? No.
Does is have all the nice to have features, like logging and historic entries? No.
Does it leverage all the possibilities of TTFs in Power BI, like using the Button/List slicers, and clever formatting of the buttons that trigger the UDFs? No.
Does it leverage best practice python coding with input validation, try/catch statements and reusable formula logic inside the UDF? Also no.
The purpose of this blog was to show you how easy it can be to get started with the simplest possible write-back applications for Power BI using TTFs, even for those of you with no Python background (like me!).
Future blogs will cover the additions above, look into write-back to other Fabric items like Warehouses and Lakehouses, as well as compare TTFs to Power Apps, once I have sufficient understanding of the pros and cons. I also hope to also be able to create easy-to-use templates for common write-back scenarios. Stay tuned.


Leave a reply to Passing visual selections to Translytical Task Flows with DAX – Downhill Data Cancel reply